Software: Corel PaintShop Pro Photo Animation Shop
Filters: FM Tile Tools and Adjust / Variations.
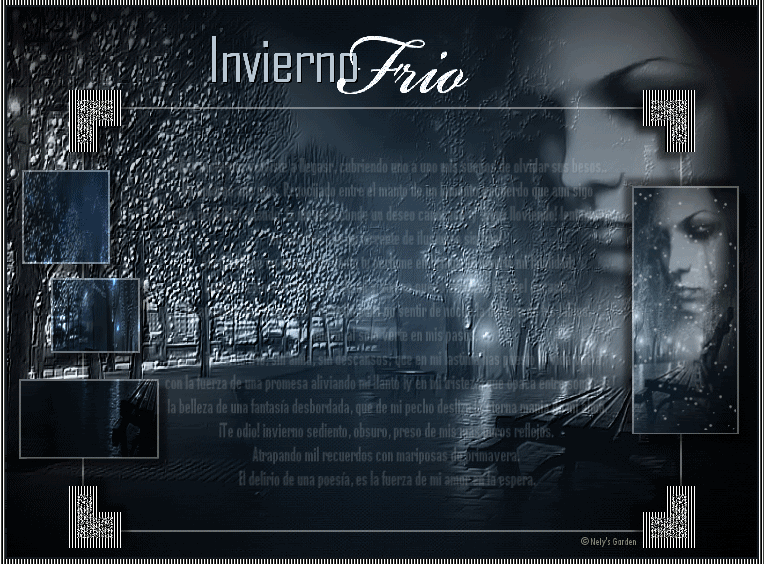
1 - Open textura_invierno.
2 - Open ne_250210_nely clouds. Copy and paste as new layer. Place top right. Luminosity Blend Mode (inherited) and opacity 44.
3 - Open-2_181110_nely pmn2 landscape. Copy and paste as new layer. Place on the left.
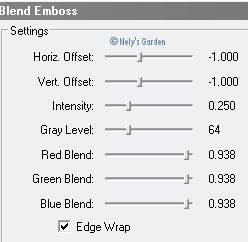
4 - Impact FM Tile Tools / Blend Emboss. Apply 3 times. Change blend mode to Luminance (Legacy).
5 - Layers / Duplicate.
6 - Open pmn_2_181110_nely landscape. Copy and paste as new layer. Right place.
7 - Effects / FM Tile Tools / Blend Emboss as in step 4, apply 3 times also. Change blend mode to Luminance (Legacy).
8 - Layers / Duplicate.
9 - Turn back the image of the clouds. Copy and paste as new layer. Place top right, a little lower than the previous. Luminosity Blend Mode (inherited) and opacity 66.
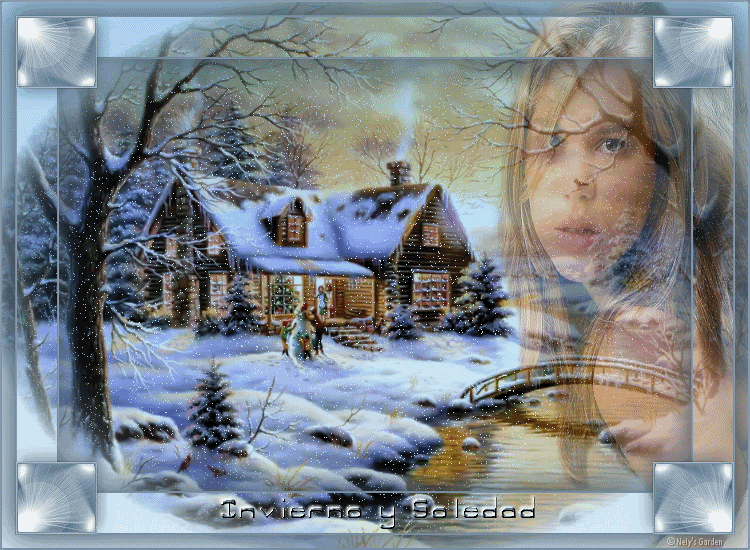
10 - Open the image of the girl m207_181110_nely. Copy and paste as new layer. Place top right. Change blend mode to Luminance (Legacy) and opacity to 44.
11 - This is how it should be the layers palette.

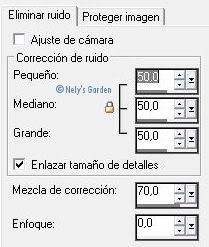
12 - Layers / Merge visible.
13 - Set / Elimination of digital camera noise.
14 - Effects / Adjust / Variations. Below right to Daker.

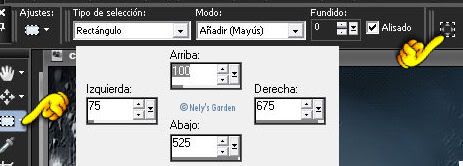
15 - New raster layer. Make a custom selection.
16 - Fill with color # ffffff. Selections / Modify / Contract 2 pixels. Edit / Delete. Lower opacity 39. Selections / Unsubscribe / selection.
17 - Open frame13_nely. Copy and paste as new layer. Color on the frame that was just made.
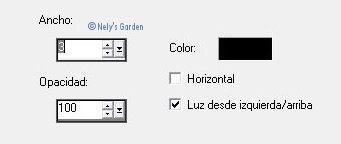
18 - Open Text. Copy and paste as new layer. Delete the title and credits. With the selection tool just expand a little up and down. Opacity down to 18.
19 - Open Image 3-if. Copy and paste as new layer. Place on the left. Effects 3D/Sombra 8, 8, 50, 7.92, color # 000000.
20 - Layers / Duplicate. Dodge blend mode and opacity 50.
21 - Open image 2-if. Copy and paste as new layer. Right place on the frame.
22 - Effects 3D/Sombra. 8, 8, 50, 7.92, color # 000000. Repeat with vertical and horizontal -8.
23 - Open string2. Copy and paste as new layer. At the top.
24 - Place signature or watermark.
25 - Image / Add borders / Symmetric 2 pixels, color # 000000.
26 - Image / Add borders / Symmetrical 5 pixels, color # ffffff. Select it with the magic wand.
27 - Texture Effects / Blinds. Apply 2 times.
28 - Edit / Copy. Open Animation Shop program. Edit / Paste as new animation. Duplicate frames to get 36 that are having the animation that will be used.
29 - Open snow_inviernofrio_Nely'sGarden. Edit / Select All / Edit / Copy.
30 - Now in our work. Edit / Select All / Edit / Paste / In the selected frame. And put in place.
31 - Giving a preview and if I get it to save as gif.